Maxpatch Studio ORC Week 6: The reveal!

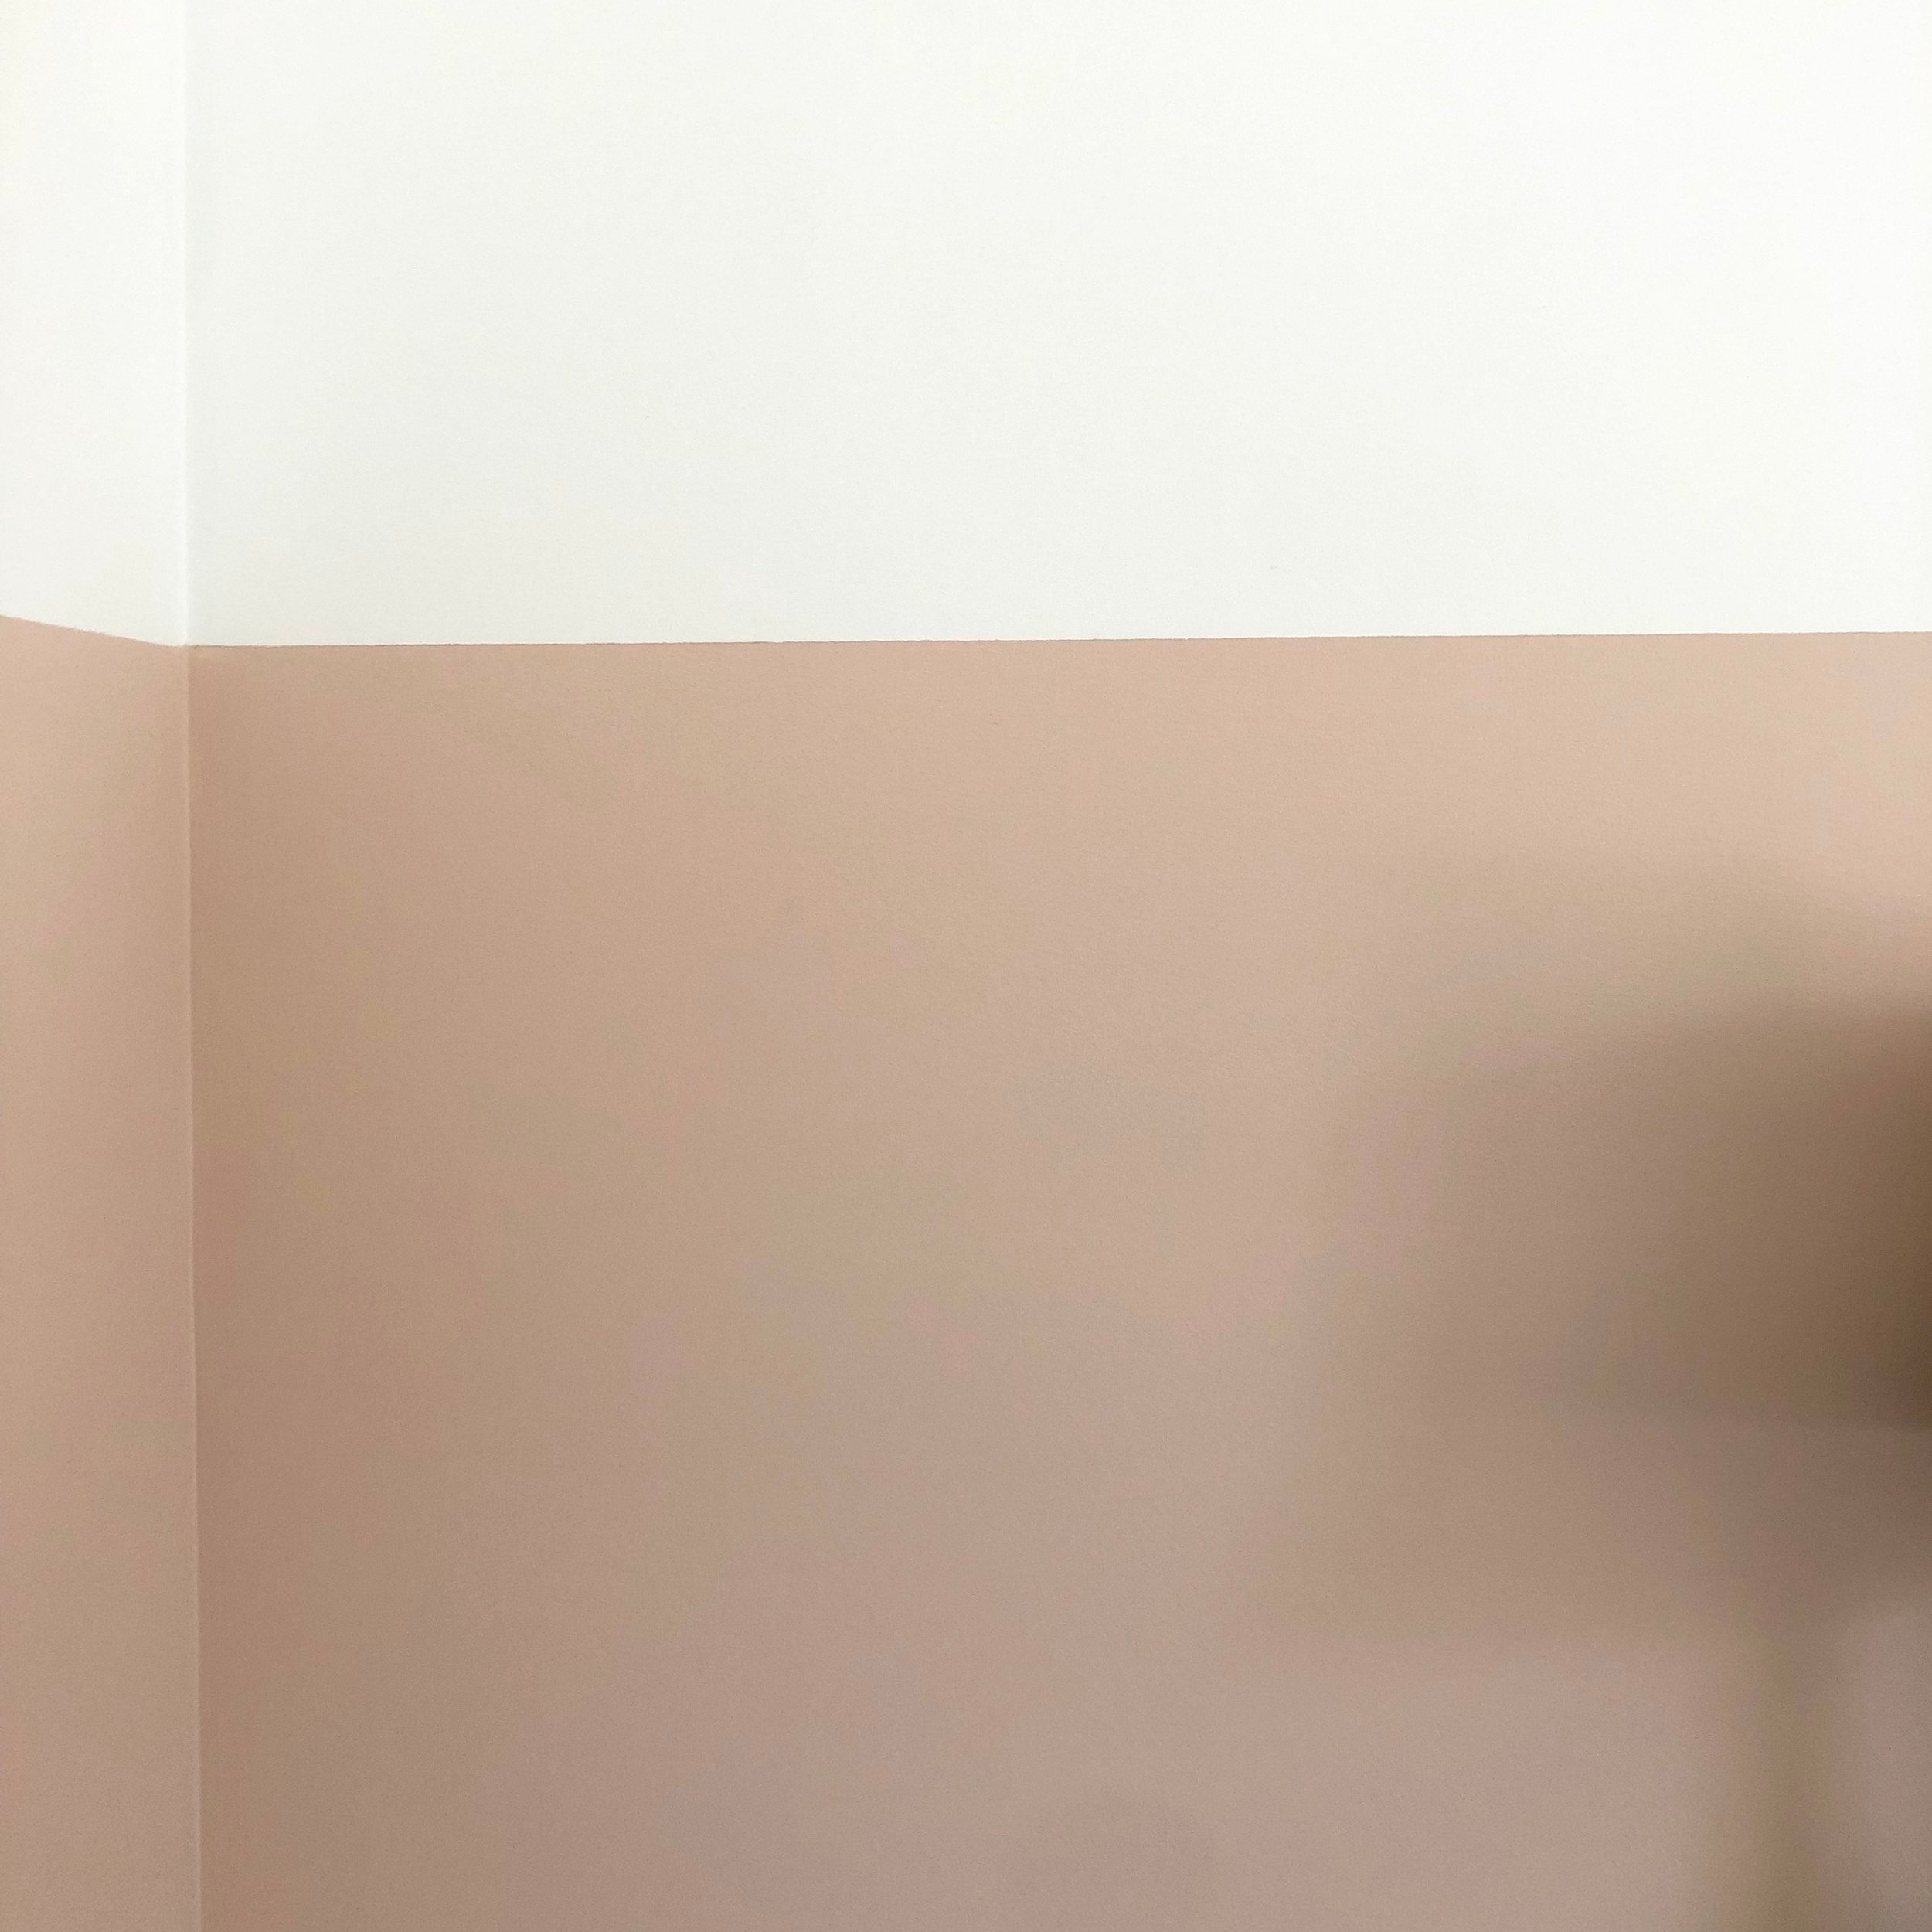
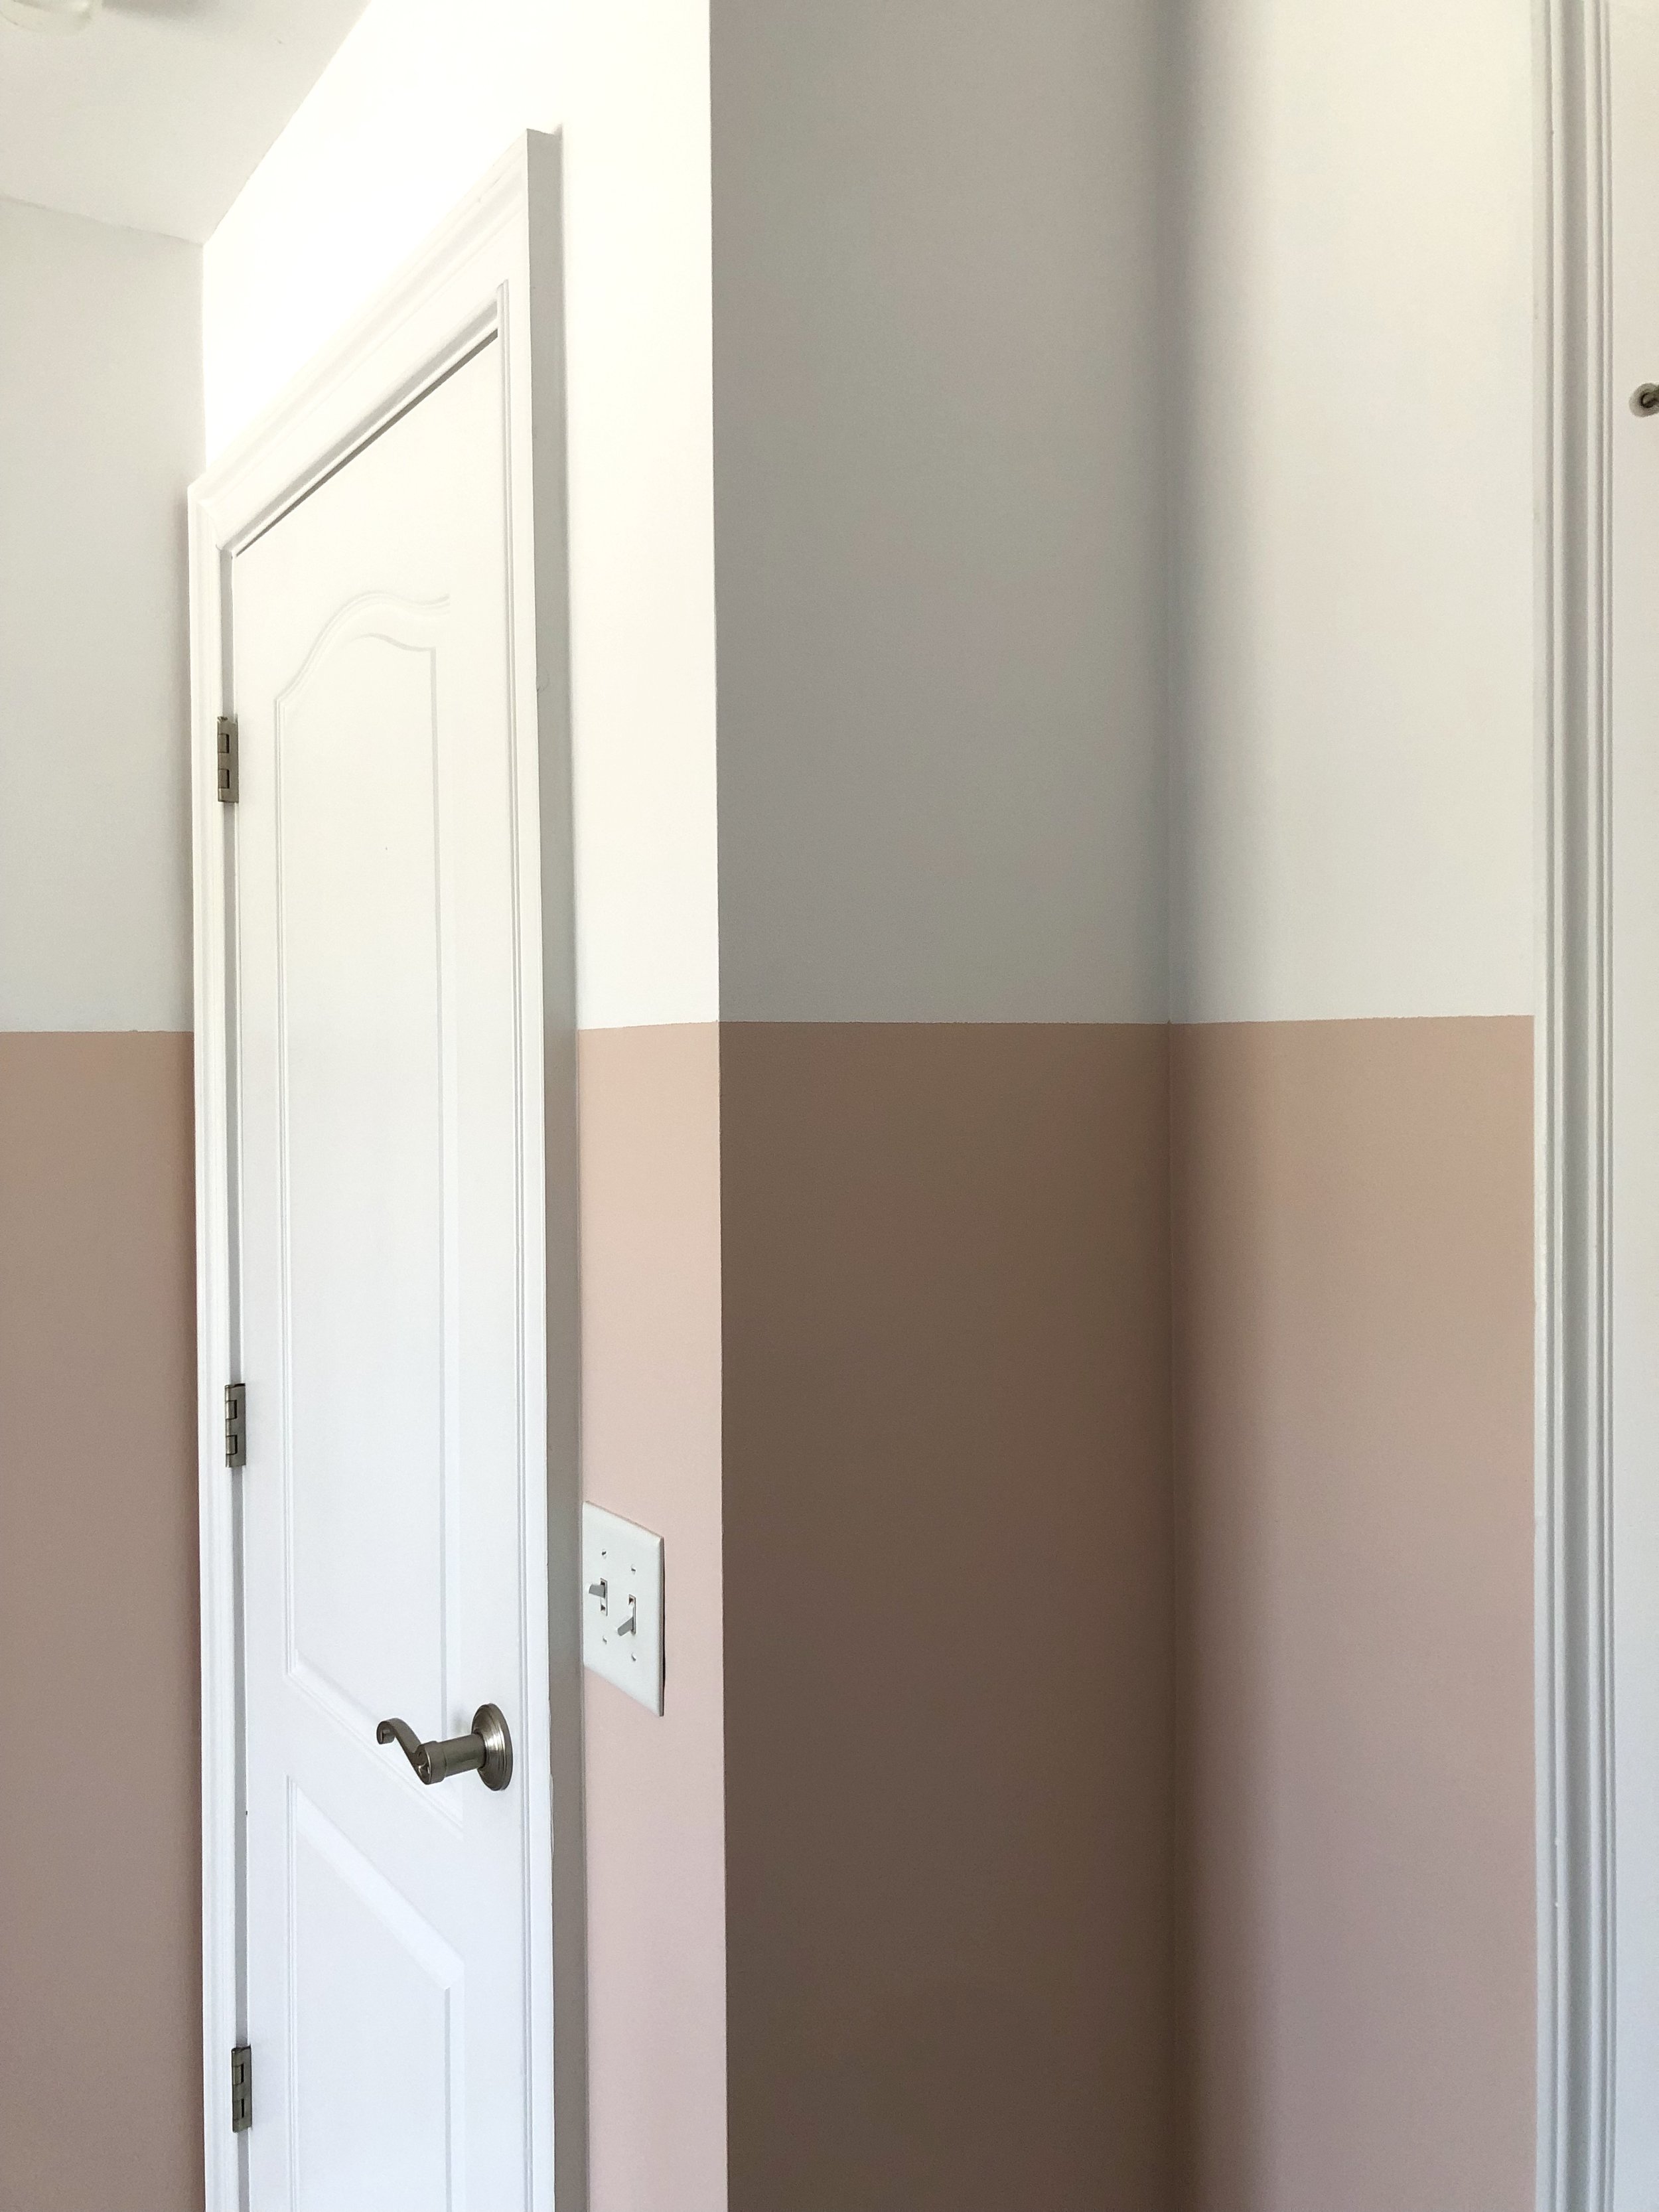
Week six of the One Room Challenge, time for the big reveal! It was an honor and true pleasure creating this sweet sanctuary for my client’s baby girl due in June. As a boy mom myself, it was so fun to take a more feminine approach to this room—the rose tones and earthy greens throughout the space really shine. If you remember, our budget for this space was around $800 (excluding a few props brought in for photos). Don’t be intimidated by budget, but do be thoughtful with where you spend your money. Focus on high impact items first and don’t be afraid of creative paint choices! Quick reminder of where we started…

guest room before
guest room before

Someone asked me the other day what’s unique about Maxpatch Studio—I’m very passionate about functional (and beautiful) spaces that can grow with kids throughout the years. It’s fun to add new accessories (artwork, bedding, wall decor, etc.) as they grow, but you don’t want to have to redesign the entire space as babies become toddlers and toddlers become preschoolers. The space we created for baby girl will serve her well for many years to come.

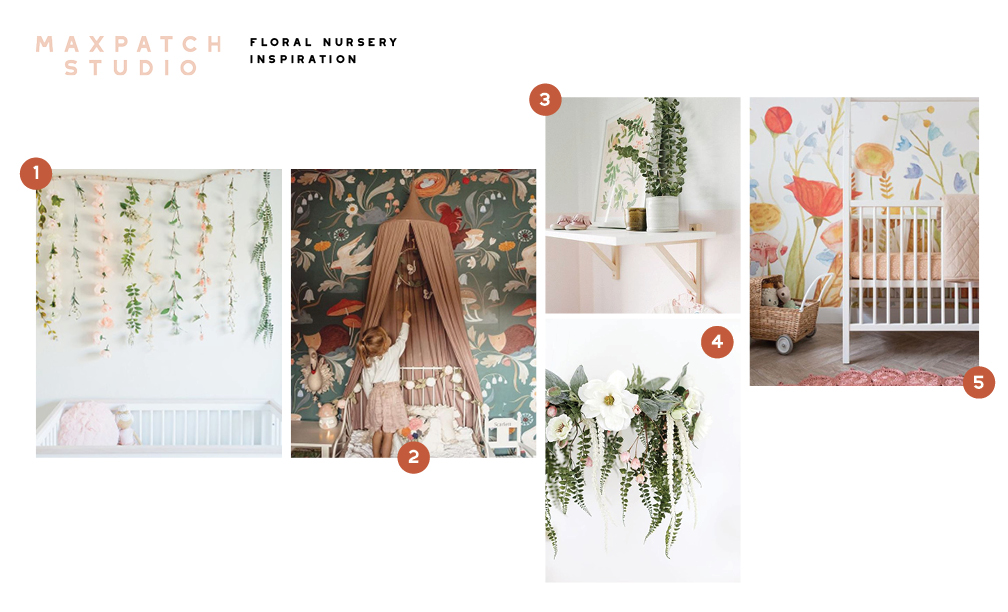
While we had a very thorough plan going into this project (see style board and floor plan below), six weeks from start to finish is no joke. That said, it’s super satisfying. I’m glad we spent the time up front to create the plan because it made everything else run much smoother, including mapping out when to tackle what in the following weeks.

floral nursery style board
floral nursery floor plan

Ok, enough with the preamble, here she is!

modern floral nursery
DIY floral wall hanging
floral crib bedding
vintage dresser changing table
floral nursery design
nursery butterfly artwork
*nurserychangingtablecloseup.jpg
nursery reading nook
modern girls nursery
nursery bookshelves
kids reading nook
colorful kids books
nursery wall hooks
wildflower wood wall art
baby shoes

All photos for the One Room Challenge beautifully captured by Cameron Reynolds.
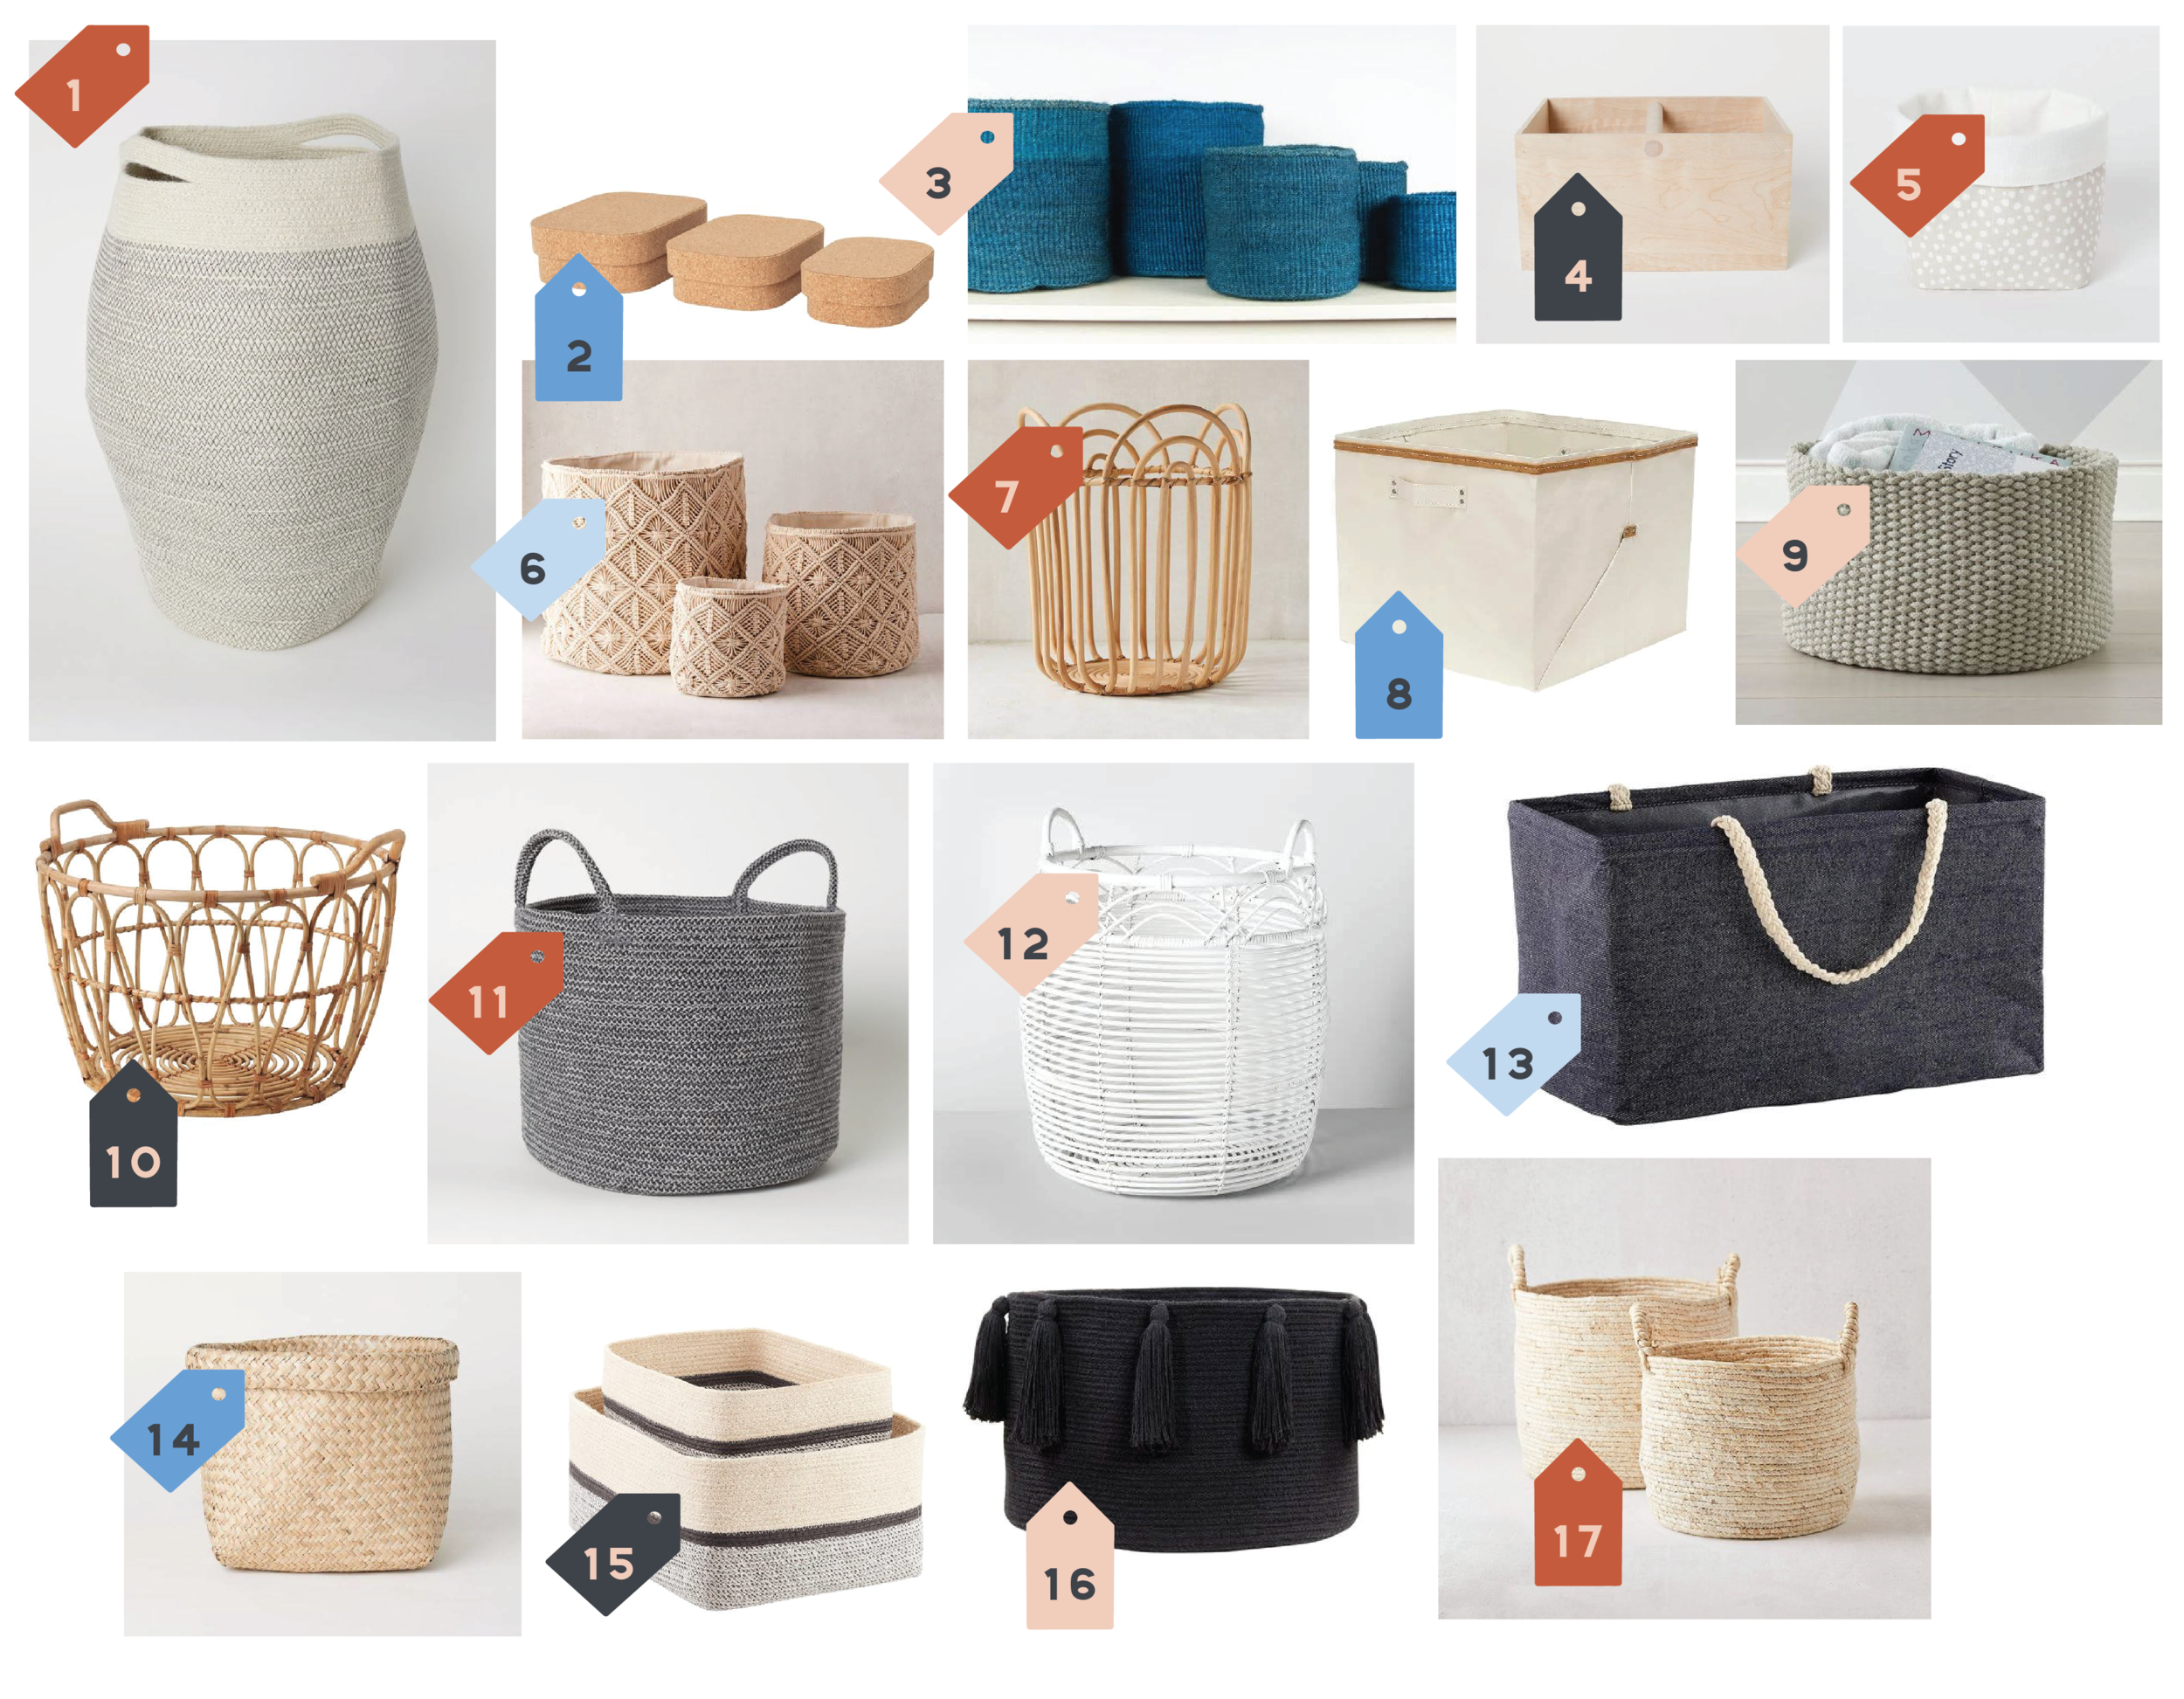
Shop the room:

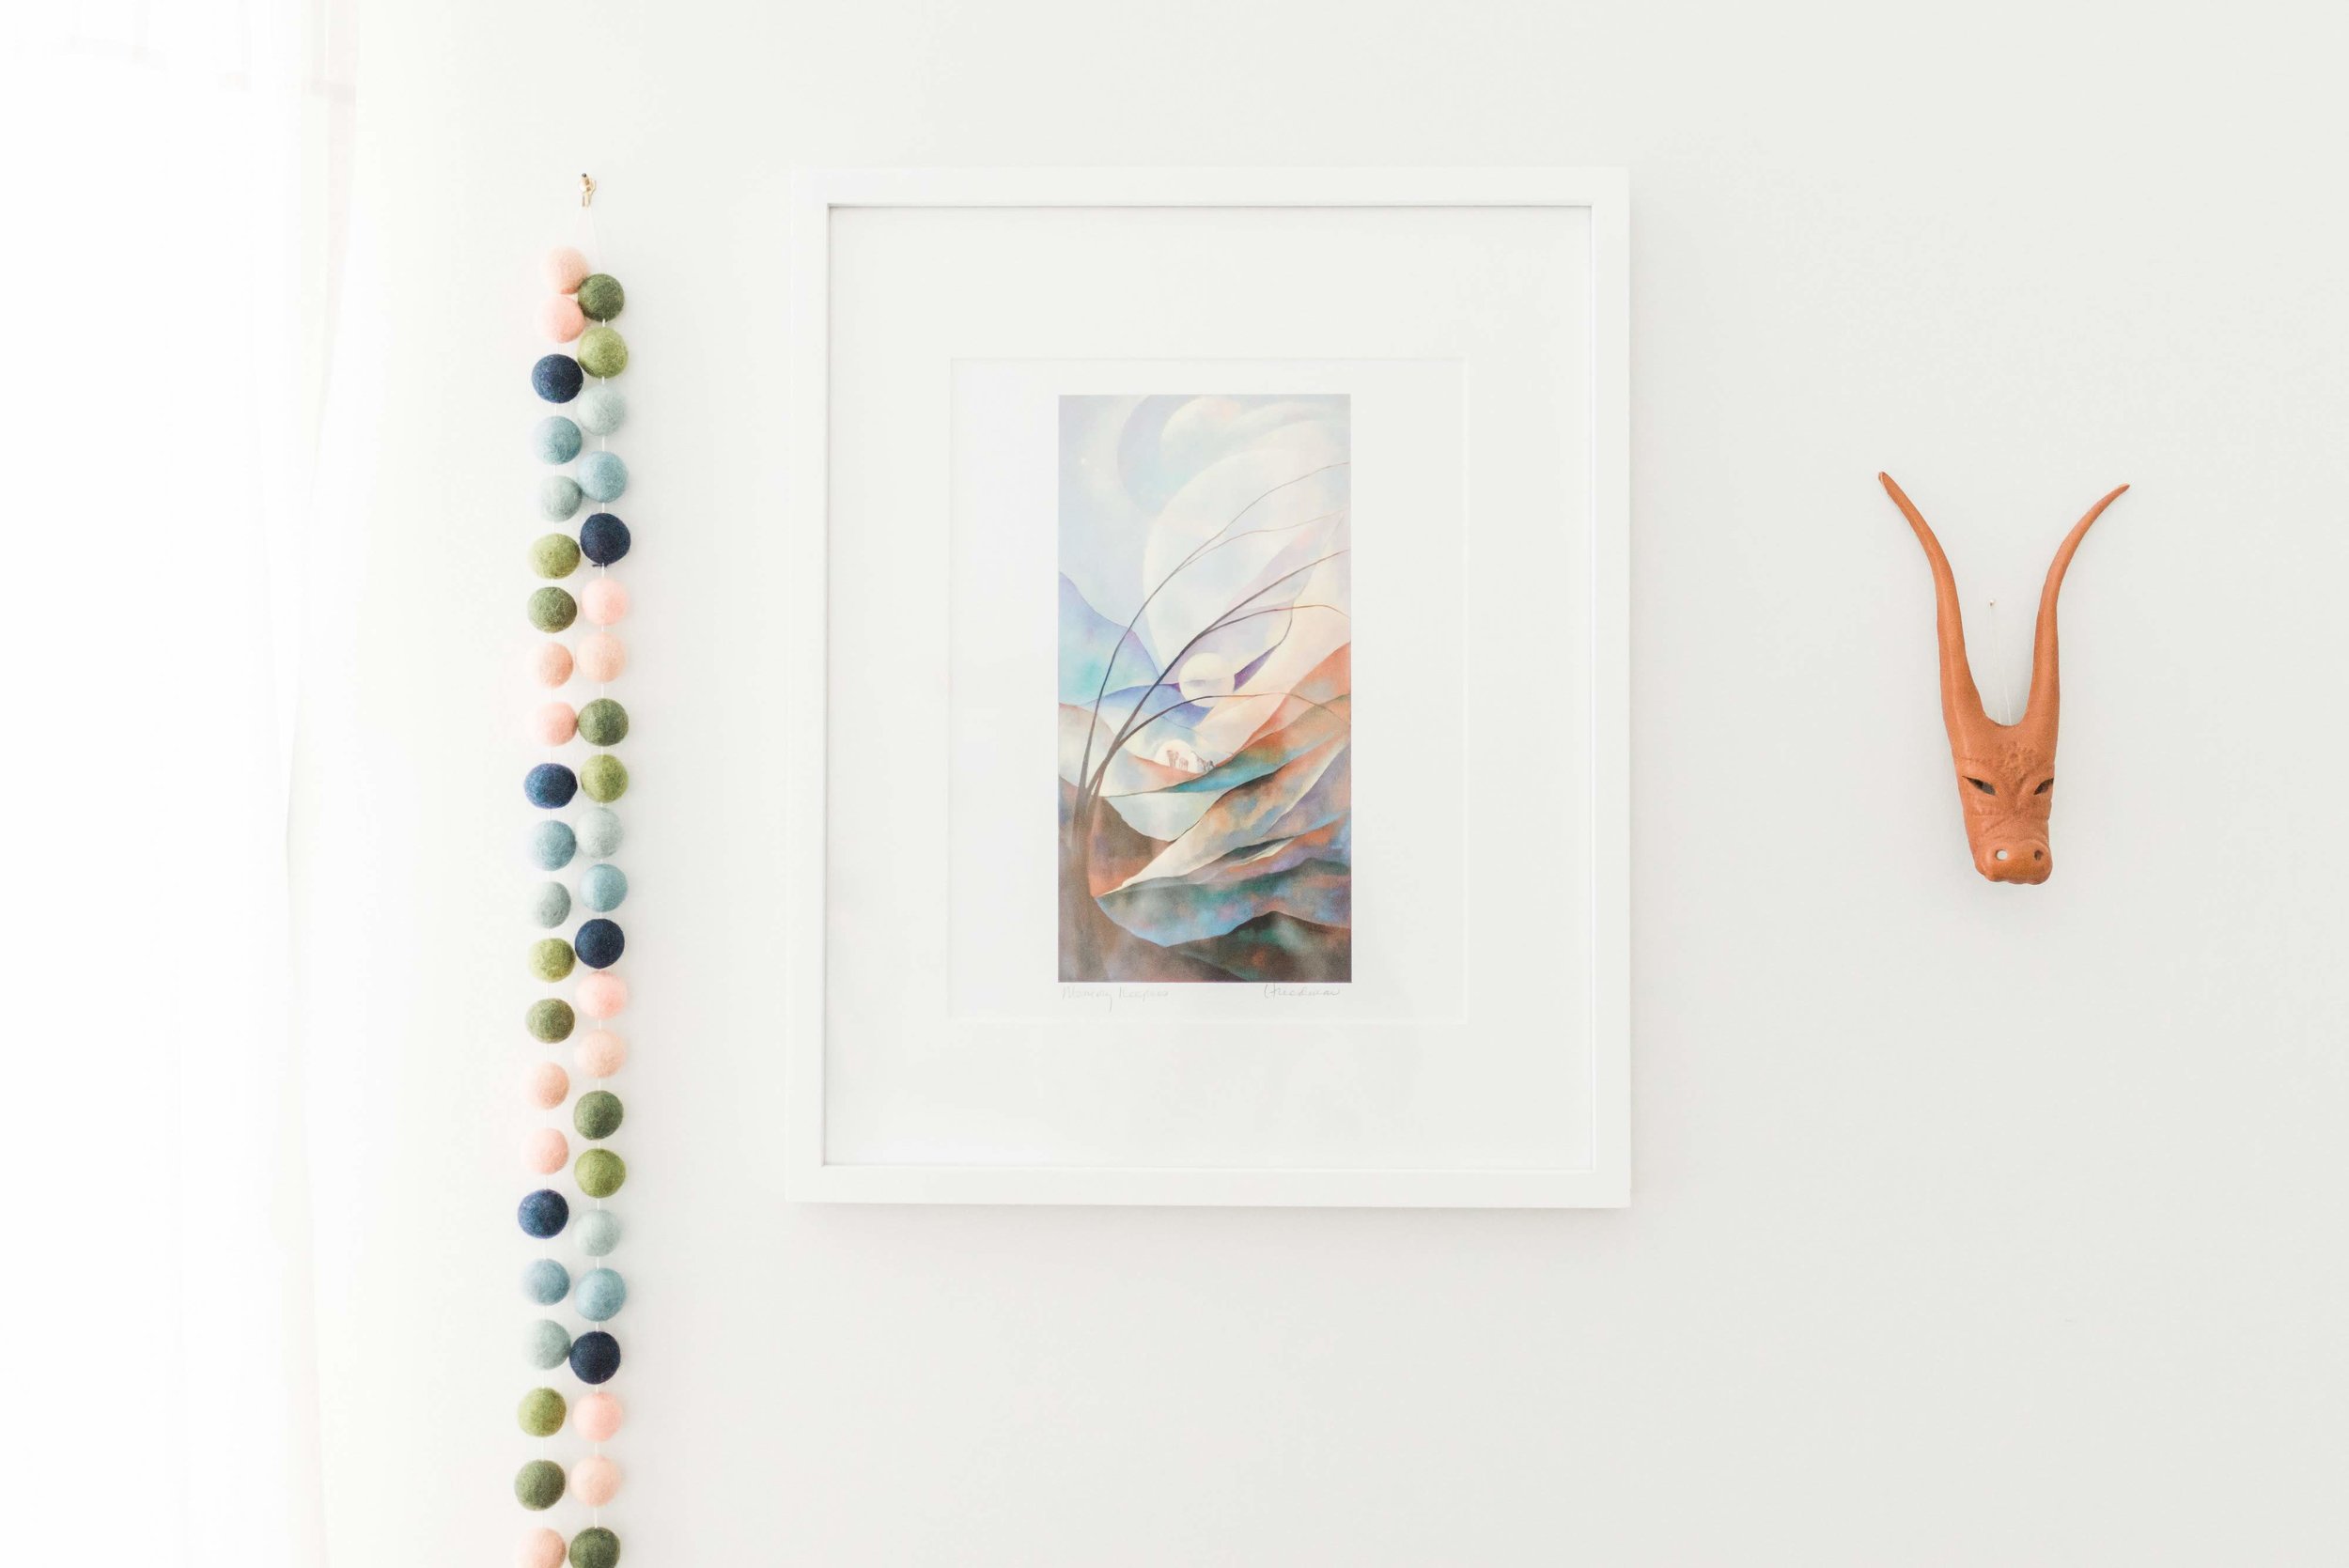
Wall frame, IKEA $13

Butterfly art print, Etsy $25

Felt garland, Etsy $29.50

Dresser, Craigslist (painted Benjamin Moore Jack Pine)

Decorative coiled rope basket, Target $13

Floral changing pad cover, Amazon $24

Table lamp (client’s own)

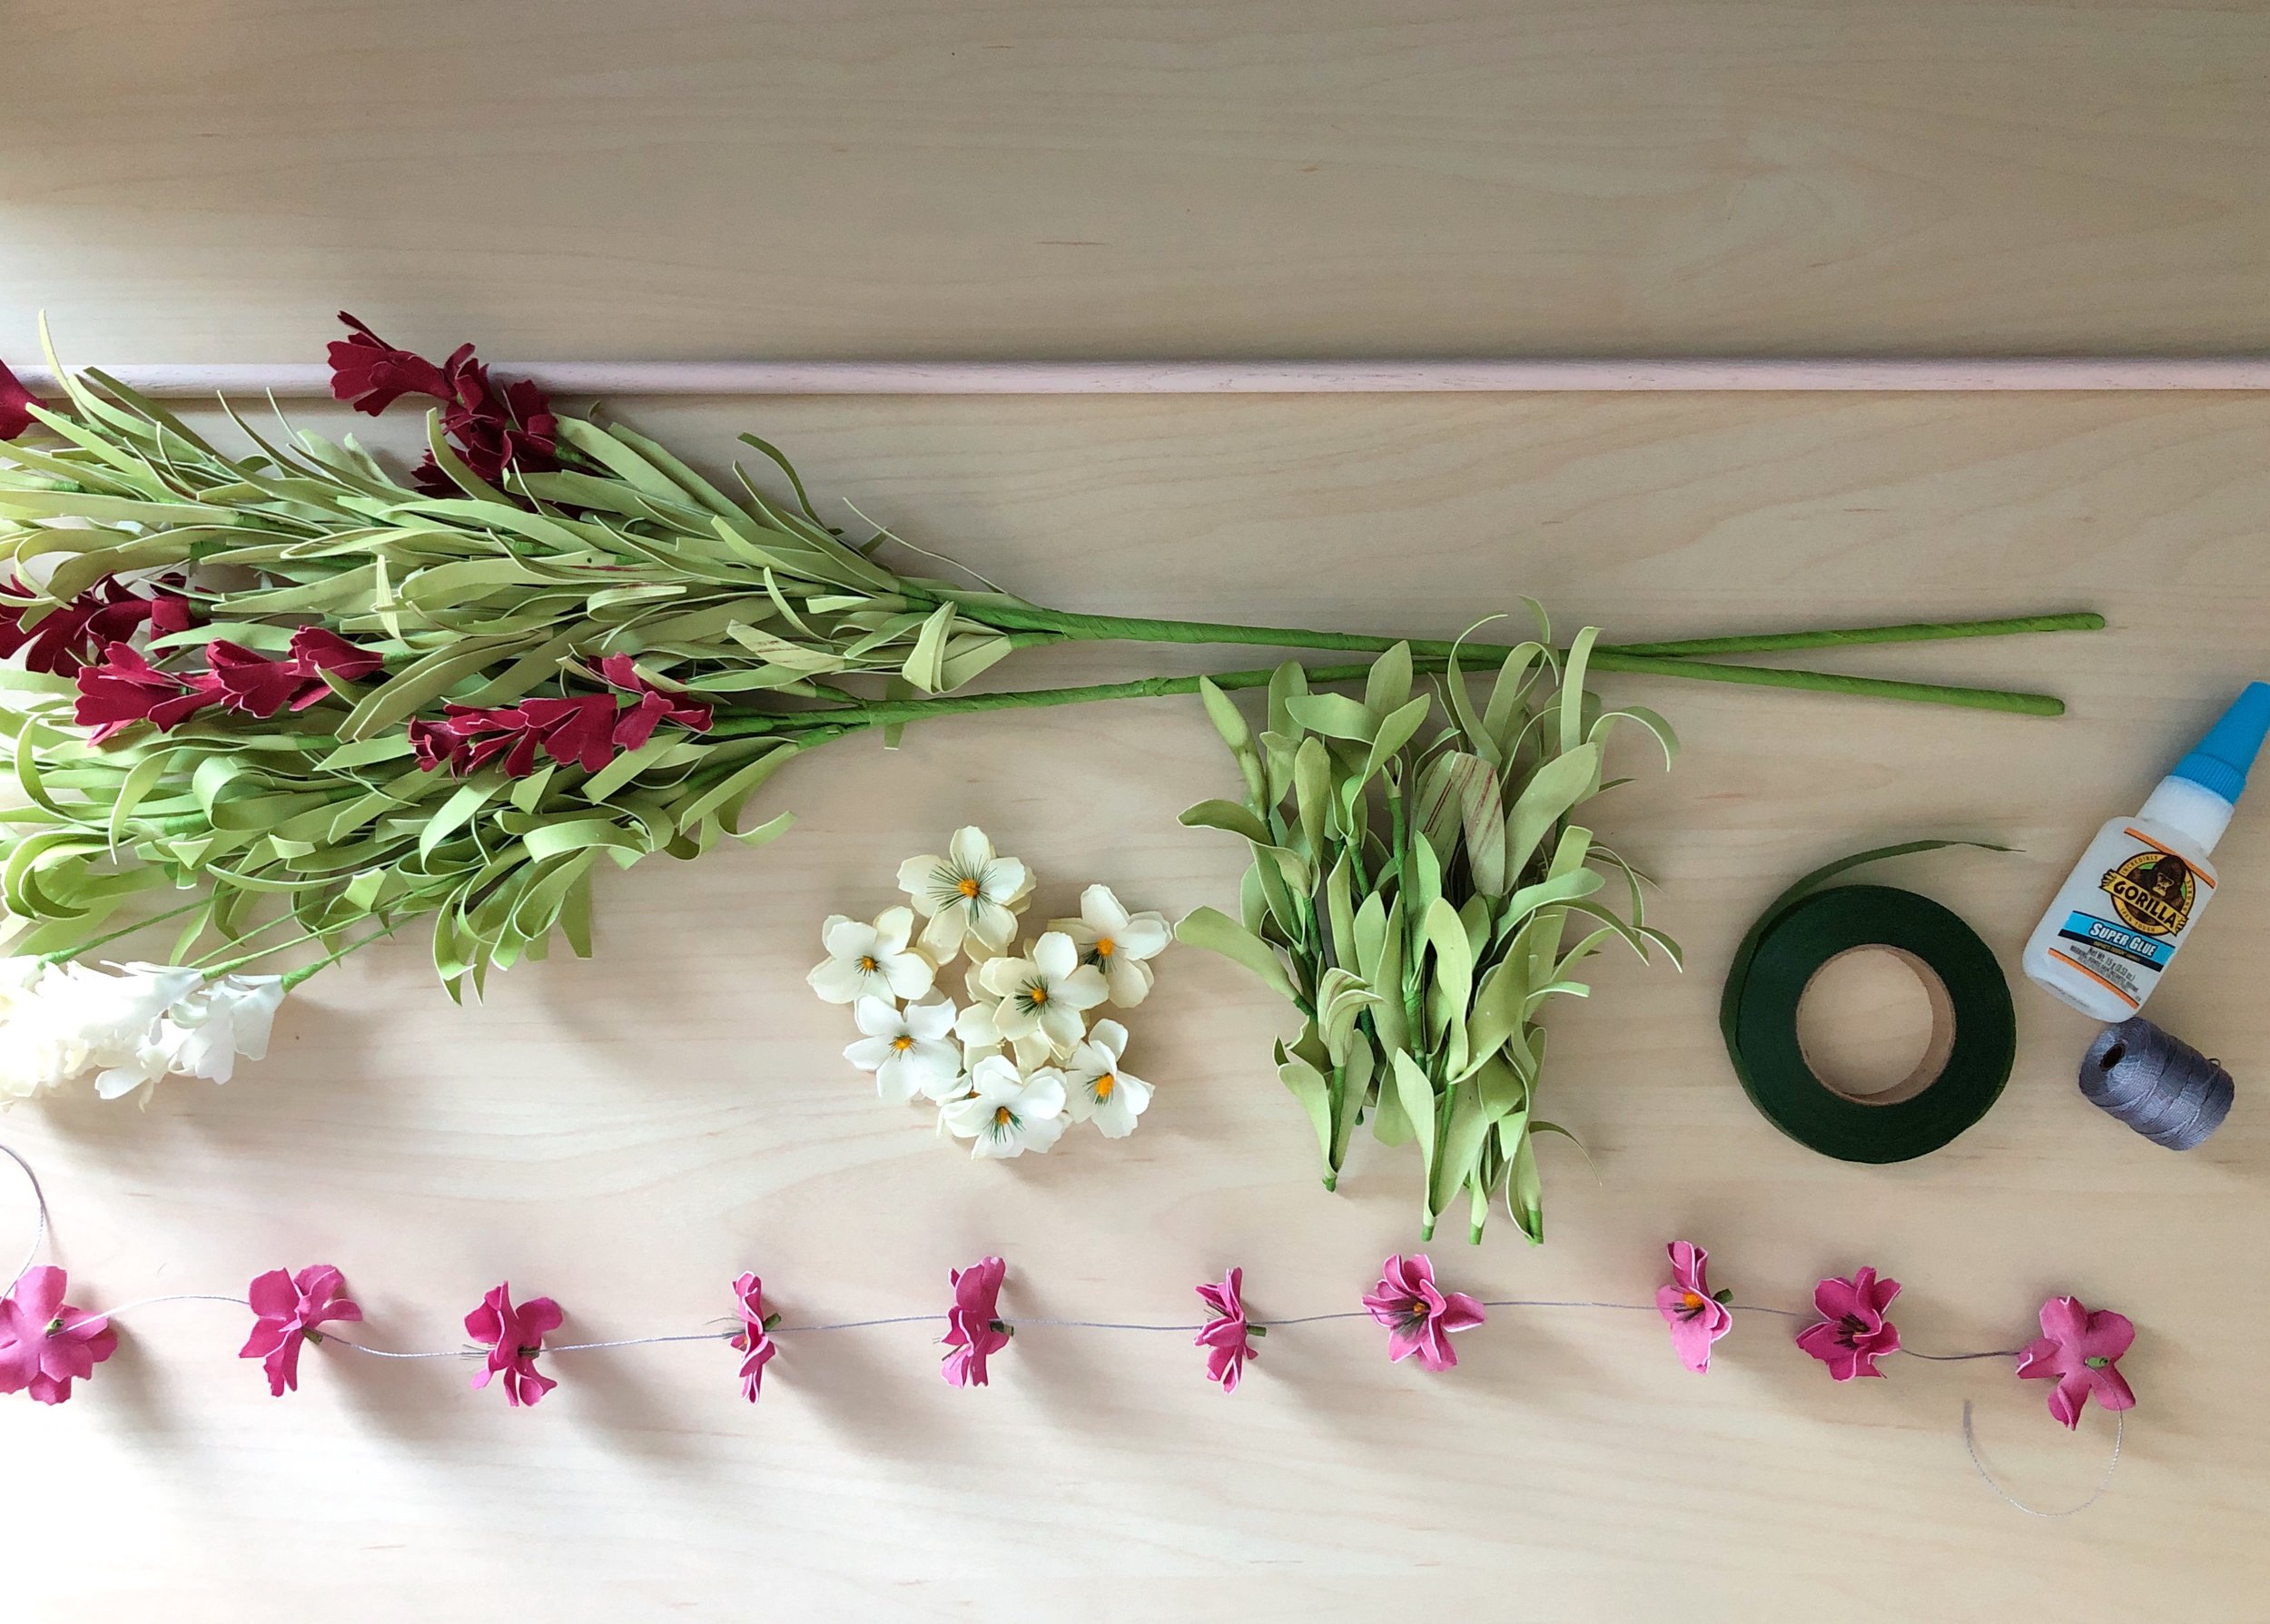
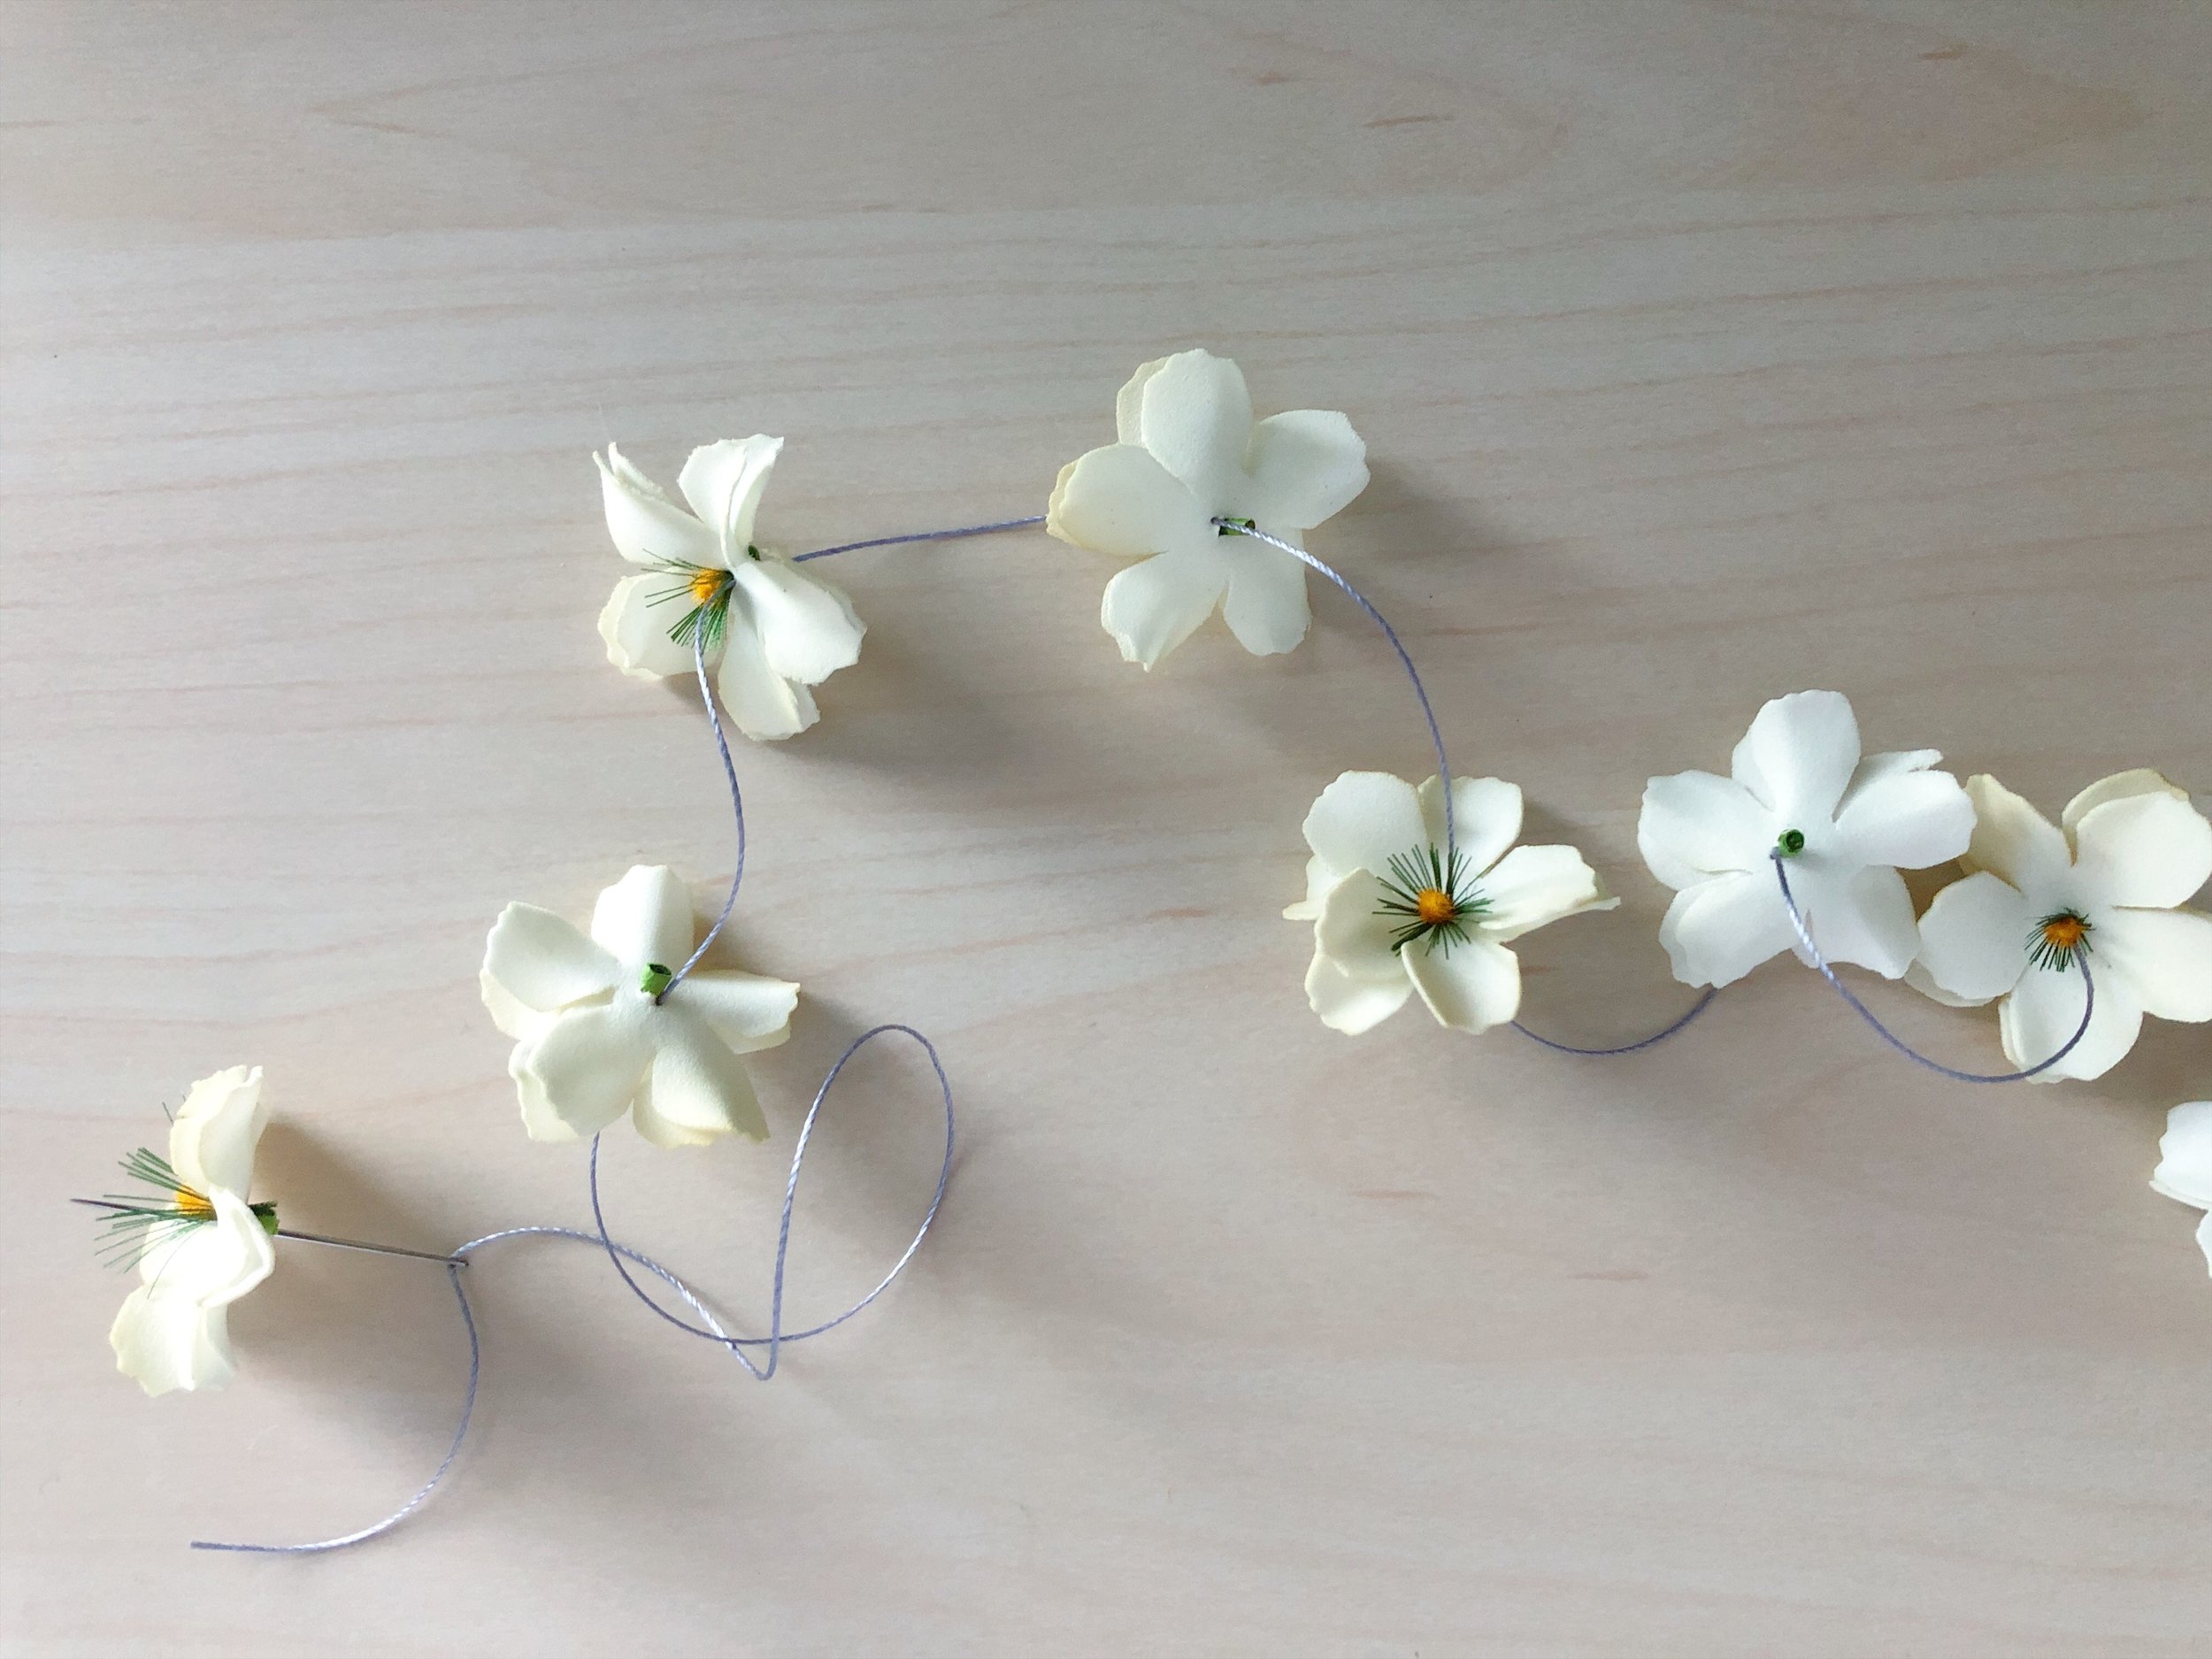
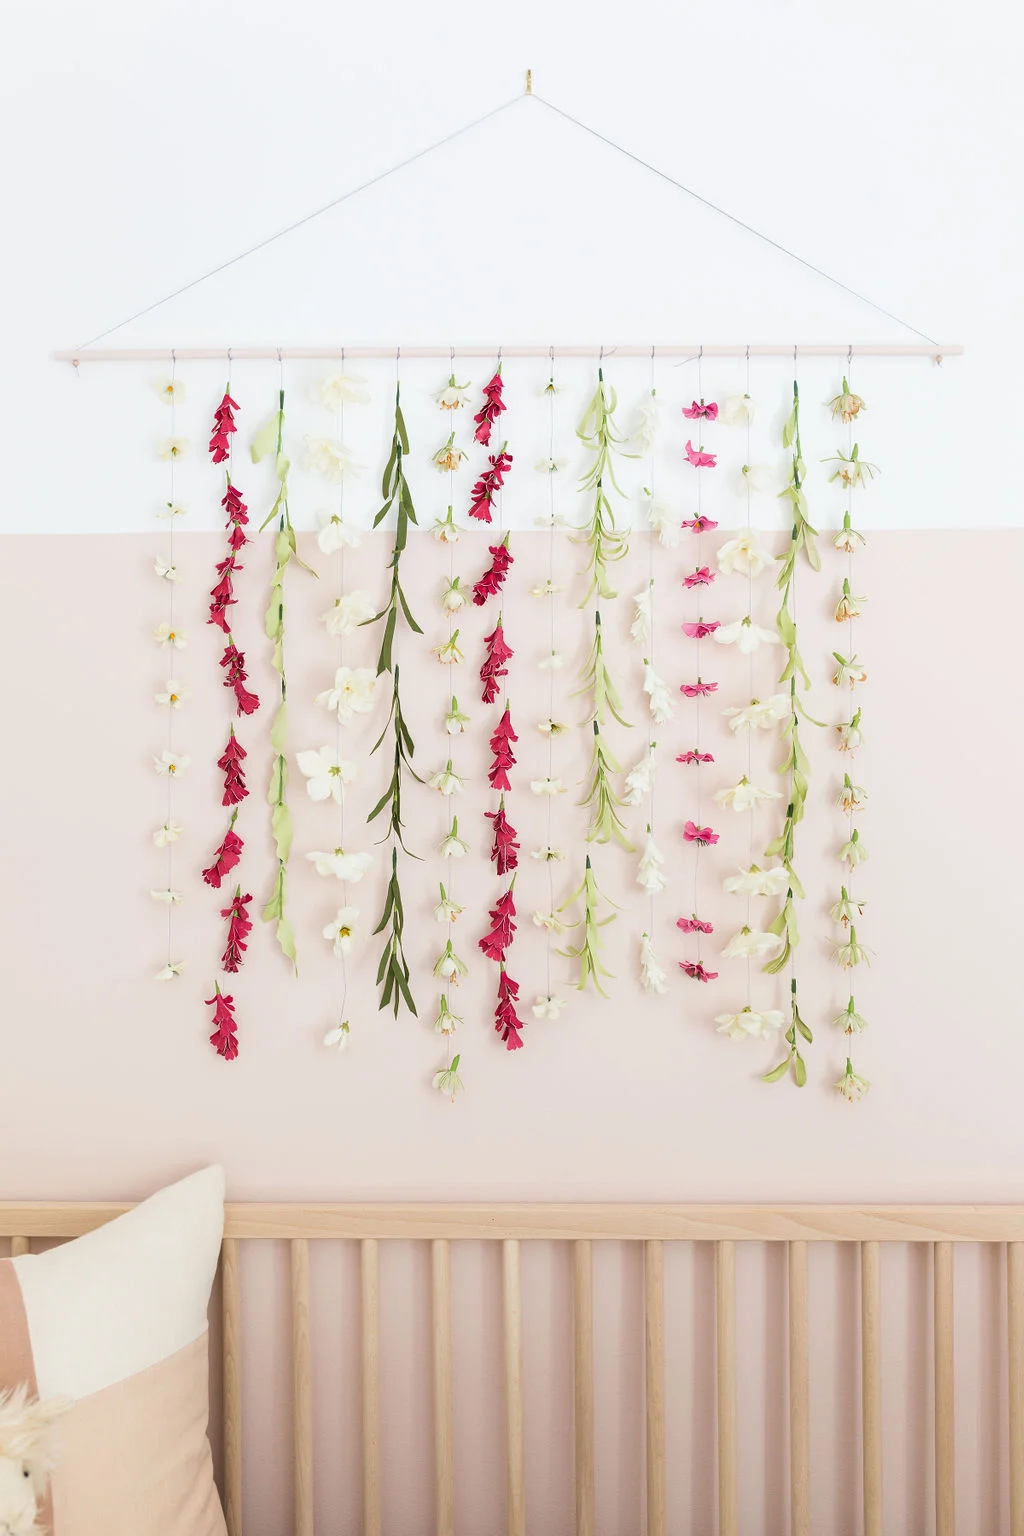
Floral wall hanging, DIY (see post for step-by-step instructions)

Sniglar crib, IKEA $80

Floral crib sheet, Etsy $48

Jellycat Llama, Crate&kids $30

Colorblock throw pillow, Target $18

Blush pink throw blanket, IKEA $25

Dusty rose laundry basket, H&M $35

5x8 sage rug, RugsUSA $100

Curtain rod, Target $18

Curtains (discontinued), IKEA (similar here)

Dream wire word art, Etsy $28

White picture ledge, IKEA $10

Handmade maracas, $5-8 each Onora Casa, Mexico City

Beige cotton storage basket, H&M $25

Seagrass basket, IKEA $13

Leather Moroccan ottoman, Etsy $100

Birch wall hooks, H&M $18

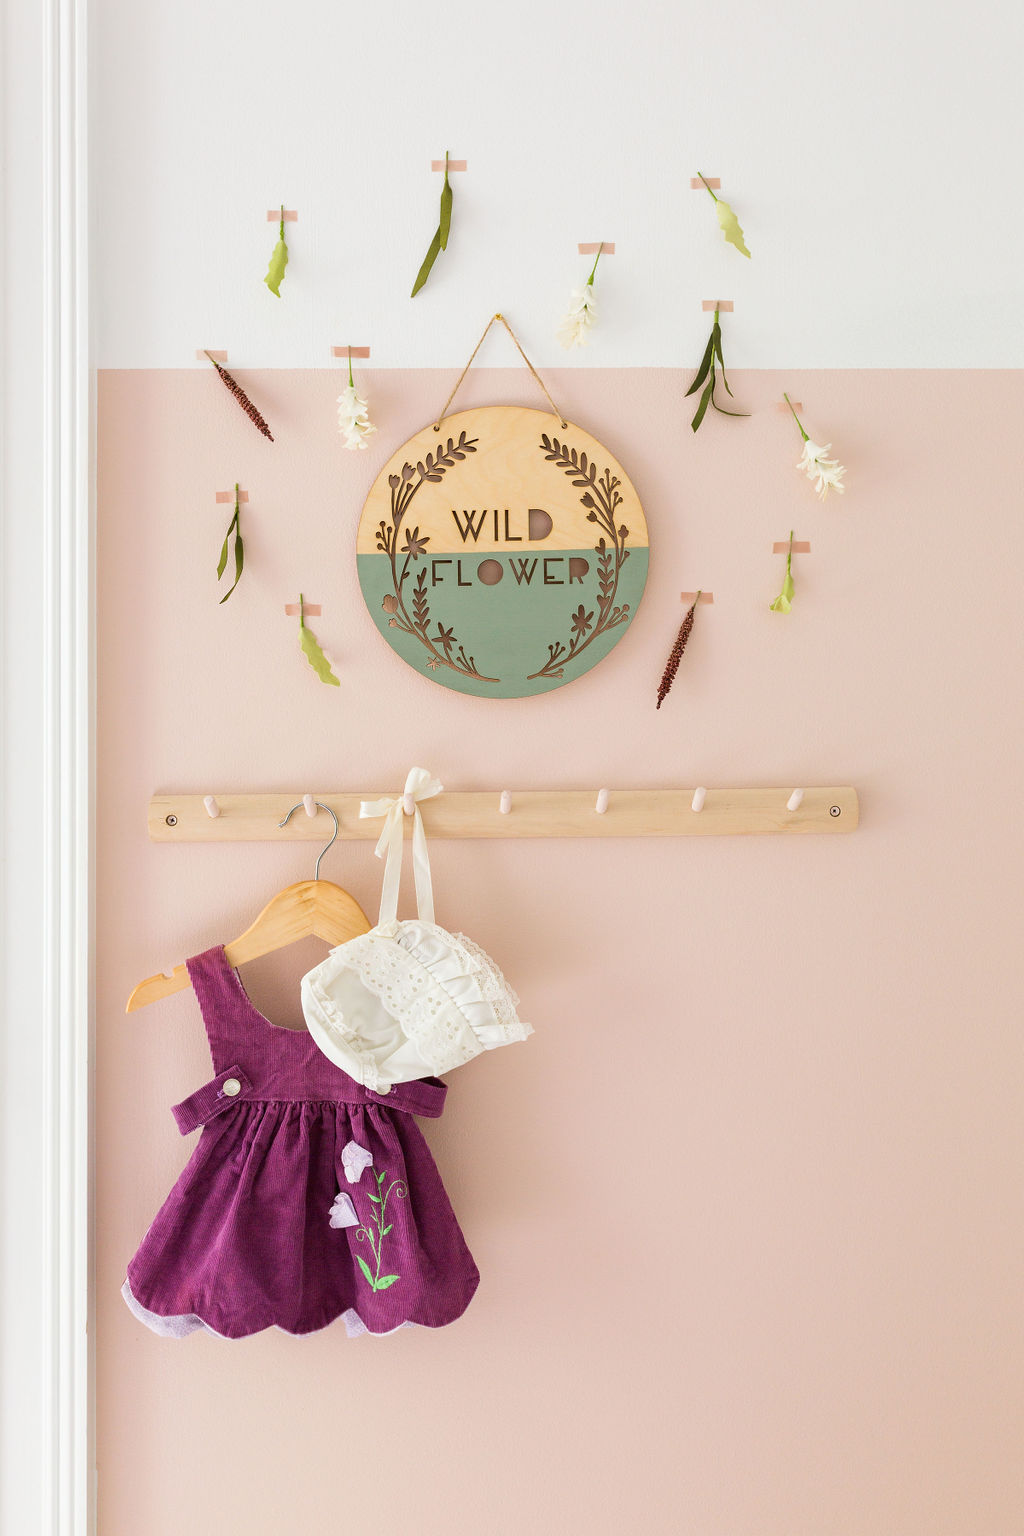
Wildflower wood wall art, Etsy $24

Congratulations to all the participating designers for completing this spring’s challenge. Head to the One Room Challenge website to see all the great work!

one room challenge

Maxpatch Studio ORC Week 5: quick update

I made it to week 5 of the One Room Challenge, woohoo! (giving myself a little pat on the back)

It’s the home stretch and I’m anxious to see all the amazing room reveals next week. The stomach bug hit our house this past weekend so I didn’t get nearly as much checked off my to-do list. But the curtains and bookshelves are hung, the wall hooks and wall art are up. Thanks to my husband! I joke that we could become another husband and wife design team, to which he immediately scoffed, lol. But he has gotten quite handy over the years and is endlessly patient with my requests to swap light fixtures and hang gallery walls ;)

nursery bookshelves.jpg
nursery books.jpg
nursery+bookshelves.jpg
butterfly nursery art.JPG

All that is left to finish is to move in the crib, rug, and dresser, put some finishing details on my DIY wall hanging, and style out the space with accessories—accent rug, blanket, pillow, baskets, books, lighting, etc. Styling for photos is one of my favorite days of the entire design process. I love seeing every detail come to life. I know the styled shot doesn’t truly represent how a space looks on most days, but it’s fun to be aspirational for a few days (or weeks!) until that new baby shows up, don’t you think?

I cannot wait to share my client’s floral inspired nursery next week—which I need to remind you, was designed and installed with a budget under $1K. You can have that nursery of your dreams without breaking the bank, but it can take some clever internet sleuthing to find quality items at a decent price. I’ll share all the sources next week. In the meantime, if you need nursery ideas, check out my Pinterest boards for little rooms, accessories, storage solutions, and artwork!

For updates from fellow participating designers, head to the One Room Challenge website!

one room challenge

Maxpatch Studio ORC Week 4: DIY progress

It’s Week 4 of the One Room Challenge—how did that happen? Then again, next week is May so time is flying by in all directions. My goal this week is to complete the DIY floral wall hanging for my client’s nursery. Last night I sat down with will and determination to strategize. Let’s just say things are always so much easier in your head. After a few finger pricks with a needle, some super-glued appendages, and a bit of cursing, I finally cracked a method. When finished, the hanging will have somewhere between 15-18 strands of florals in various shades of cream, pink, and green.

DIY nursery wall hanging.JPG

What you will need:

  • A 36” dowel rod—I’m using a ⅜” diameter and I painted it the same color as the walls: Benjamin Moore Rose Accent

  • Assorted faux floral—I selected several varieties during Hobby Lobby’s 50% off floral sale (which is going on now), these stems are made from a soft-touch foam but look similar to a paper flower, which will add nice texture to the wall hanging

  • Beading thread or equivalent cord string—I’m using something similar to this

  • Sewing needle

  • Floral tape

  • Super glue (inevitably, some of your floral pieces may come apart when you cut them off the stem—I used super glue to gently glue them back together)

Step-by-step:

  • Separate the flowers from the stems—maintain a small part of the stem to keep the flower intact (you can use the leaves too for added greenery)

  • Measure and cut each piece of thread to about 36” in length—you’ll need some extra length to attach to the dowel rod. You can trim any unwanted length at the end once all the strands are in place and attached to the dowel rod. I’m aiming for each strand to be ~26-28” long

DIY floral wall hanging 2.JPG
  • Attach a sewing needle to end of your thread and gently thread each of the individual flowers to create a single strand—I placed the flowers every 2” but you can adjust the spacing accordingly

I used the same flowers to complete a single strand

I used the same flowers to complete a single strand

Use a sewing needle to thread flowers 2” apart

Use a sewing needle to thread flowers 2” apart

  • Once you have all the strands complete, lay them out in the order you would like and attach to the dowel rod by creating a secure knot

  • To hang on the wall, I drilled a small hole through each end of the dowel rod and used the same beading thread to create the hanger. I added a small bead to both ends and knotted the string below the bead to keep it in place (the bead is optional, you could just as easily knot the string at the base of the hole)

  • Add a nail to the wall and hang at your desired height, voila! (PS: you’ll have to wait for the full reveal of my DIY in Week 6)

For more design goodness, check the One Room Challenge website  for updates from all participants!  

one room challenge

Maxpatch Studio ORC Week 3: DIY inspo

It’s week 3 of the One Room Challenge and I’m slowly, but surely making progress on the floral-themed nursery I’m creating for a client of mine. Yesterday my husband was kind enough to assist with hanging bookshelves and curtain rods, my least favorite things. Even with a few things up on the walls, it’s starting to take shape (Eek! I can’t wait to see the mama-to-be’s face when she gets home from her Easter weekend).

Next up on my to-do list is to create her DIY floral wall hanging. I still have yet to determine exactly how it works, but I will be sure to share the step-by-step details in next week’s post. I picked up a 36” dowel rod from Lowe’s yesterday, which will get a fresh coat of paint to match the walls. And then the fun begins, with lots of trial and error to determine the best way to hang the strands of florals.

Until the reveal next week, I’ll leave you with some inspiration I found from the web and a sneak peek at the flowers I choose for the hanging during Hobby Lobby’s 50% off florals sale from a few week’s back. Who doesn’t love a good deal?

floral nursery

Sources:
1//
2//
3//
4//
5//

I found the prettiest paper florals from Hobby Lobby—excited to share my progress in next week’s post!

I found the prettiest paper florals from Hobby Lobby—excited to share my progress in next week’s post!

Lots of work happening on so many amazing spaces, check out the One Room Challenge website to see updates from other participating designers!

one room challenge

Maxpatch Studio ORC Week 2: Paint

It’s Week 2 of the One Room Challenge—this week I’m unveiling the simple magic of paint. While absolutely nothing else in the room is complete, paint completely transformed the space. It’s the biggest impact for the least amount of investment. I always encourage clients to consider a paint change, even if it wasn’t on their radar initially. I’ve never been disappointed in my decision to bust out my paint brush. See how we turned this basic beige into a beautiful backdrop for our floral-inspired nursery.

Before: basic beige walls are getting a makeover

Before: basic beige walls are getting a makeover

2019 one room challenge week 2

I knew we wanted to go pink in this room, but I wasn’t sure how much. My client, a second time mom-to-be, wasn’t sure about an an all pink room so we went with a half-wall design and painted Benjamin Moore Rose Accent on the lower half of the wall, up the the 5’ mark, and kept it nice and bright on top with Benjamin Moore Chantilly Lace. I’m so happy with how it turned out. To contrast the pink and white, we’re repainting a vintage dresser in Benjamin Moore Jack Pine. It’s going to be so good together!

one room challenge week 2
2019+one+room+challenge+week+2
2019 one room challenge week 2

Next week I’m going to share some inspiration for my DIY wall hanging, which will be a major focal point in the room.

Don’t forget to check out all the other amazing One Room Challenge participants—so many great spaces getting makeovers this spring!

one room challenge

Maxpatch Studio ORC Week 1: The Plan

Since launching Maxpatch Studio last February, I decided this was the year I was going to tackle the One Room Challenge. And thanks to a client of mine, I found the perfect project for the challenge—a guest room turned nursery for a baby girl on-the-way.

Before: here’s a look at the guest room ready for a nursery makeover

Before: here’s a look at the guest room ready for a nursery makeover

For any new project I start with a site visit and conversations with the client. We discuss intended use, space considerations, design goals/vision, and of course, budget. Our One Room Challenge budget for this project is below $1K for furniture, accessories, paint, lighting, etc.

The design process continues with a brain dump of inspiration on a Pinterest board, followed by style boards to share with the client. For this space, my vision is feminine and playful with floral accents, able to grow with baby over time, and gives mama that dose of pink she’s craving without going overboard. Earthy greens, dusty rose, hints of natural woods and white to keep it fresh—that’s what we’re after.

Earthy hues: dusty rose, moss , emerald, and sage greens, a touch of ochre and pops of white

Earthy hues: dusty rose, moss , emerald, and sage greens, a touch of ochre and pops of white

I love searching Etsy for one-of-a-kind items that can be customized without breaking the bank. I’m super excited about the accessories we’ve found to add personality and warmth to the nursery and can’t wait to share a wall decor DIY in the works.

Handmade, one-of-a-kind accents , natural woods, and lots of texture—all for under $1K

Handmade, one-of-a-kind accents , natural woods, and lots of texture—all for under $1K

Lastly, here’s a sneak peak at the floor plan. It’s a tricky space with lots of doors and windows to work around, but a perfect size to fit all the essentials. Next week, time for paint!

Floor plan drawn to scale so there are no surprises on install day

Floor plan drawn to scale so there are no surprises on install day

Click here for updates from the many One Room Challenge participants.

one room challenge

Tips For a Photo-ready Nursery

I’m a designer. I’m also a mother. That newborn phase, it’s all consuming. Full of highs and lows. A shower and a warm cup of coffee on any given day feels like a solid win. Bonus points if anyone leaves the house. For seasoned parents, we know this is a fleeting phase. Just one of many that will come and go with the blink of an eye.

To preserve those precious newborn weeks, we invite a photographer into our homes to capture our newest family member. Despite the mere two hours of uninterrupted sleep, we mask the dark circles and wear enthusiastic smiles. We ask our photographer to ignore the piles of laundry, the dirty dishes, and everything else we’ve neglected since bringing home baby. We lead them to the one pristine room in the house—the baby’s nursery.

You’ve likely spent weeks and months planning that perfect nursery, and it shows. And because the only decision you need to make on photo day is whether or not to wear your hair up or down, here are a few design tips to prep the nursery for its close-up.

When I start designing a nursery, I consider the basics—crib, changing table, glider, storage—and then choose a focal point and build the room around it. Often it will be a beautiful rug or piece of art, sometimes it’s a striking wallpaper pattern or a vintage furniture piece painted a new hue. A focal point will inspire the design direction and allow other decisions to naturally fall into place.

modern floral girls nursery

image credit: KayAnna Charles

Next, I like to add soft layers—pillows, blankets, curtains, baskets, etc. The cozy factor helps with exhaustion, I promise. It also gives the space that “lived in” feel.

modern boys nursery

image credit: Courtney Malone Photography

Don’t forget to incorporate some greenery. A live (or faux) plant makes all the difference. If you are worried about baby one day mistaking his/her first solid for a new bud, a non-toxic plant option is a good choice. And there are several to choose from: snake plant, rubber plant, prayer plant, to name a few. Greenville has several great local plant stores who are willing to answer any questions you might have: Savereign in the Village of West Greenville, Urban Digs on the east side, and Roots on Augusta Road.

soft and modern gender neutral nursery

image credit: Courtney Malone Photography

For photo day especially, display some sentimental items for a personal touch—baby’s first lovey or stuffed animal, a pretty layette on a wooden hanger, hand-knit booties atop a stack of soft cotton sleepers, family photos in frames or casually hung with washi tape.

neutral nursery

image credit: Markie Walden Photography

Lastly, spend some time in your baby’s room and look for places to incorporate additional meaningful details—a colorful pom pom garland, a pennant flag with an inspirational message, a personalized piece of art, books with beautiful covers, or a trinket brought back from a far off place.

gender neutral nursery

image credit: Markie Walden Photography

These five tips go a long way. Your baby may not sleep in his or her perfect nursery for months to come, but you will spend a lot of time in it—feeding and rocking, putting away laundry and restocking diapers, staring at the books you’ll one day read together before bedtime. And chances are, you’ll have a smile on your face every time you walk in the room.

All images in this post are original designs by Maxpatch Studio.

Nursery Basics: Basket Storage Solutions

January. New Year’s resolutions. A time to get organized. More Kondo, less clutter.

This post is all about smart storage solutions for the littles in your life. From baskets to bookshelves, today’s retailers have so many great options to help moms (and dads) feel a little more in control of their spaces and to help toddlers learn responsibility when it comes to clean-up time. No need to fret if toys end up in the right basket or books on the right shelf, one less toy on the floor is a win to celebrate! I like to keep storage options neutral—whites, greys, wood tones—and save color for decor, rugs, and artwork. That’s what you’ll find in this post, but that’s not to say there aren’t plenty of colorful options out there.

You can find all my basket, bin, and bookcase picks for little rooms on my Pinterest board.
Happy organizing!

Nursery baskets and bins

Holiday Gift Guide for Tots

I debated creating a holiday gift guide for weeks, but decided I would share a handful of my favorite gifts for littles this year. These gifts are geared toward smaller children, but some are great for older kids and adults alike! I hope you enjoy. PS: if you’re looking for ways to put some structure around gift giving, I love the “want, need, wear, read” approach from Amanda Watters.

1// Personalized ornament prices vary

holiday gift guide ornament

Gifting ornaments is a tradition in my family—growing up, my parents would give my sister and I a new ornament every year. I think my mom cried a little when she handed over my ornaments the year I had my first apartment after college. I’m continuing the tradition with my son, each year searching for the perfect ornament that coincides with his growing personality. This year, it’s a race car engraved with “Leo Racing” and the number 15, his birthday. Etsy is a wonderful source to find your perfect ornament, have it personalized, and support small businesses.

2// Loog mini guitar $79

toddler gift guide

This mini guitar is made of real wood and children can learn to play songs and scales in a single day. It’s award-winning design is approved by music educators and it’s  coordinating smartphone app makes learning (and teaching!) fun.

3// Rainbow stackers from $33

wooden toys

Raduga Grez makes beautiful wooden toys—believe or not, these sets are great for adults too! I love challenging my brain to find balance in unusual ways. They make great decor, too.

4// DIY origami paper lamp $38 (includes US adaptor and light bulb)

toddler night light

A DIY project for you and your little, this paper lamp is so beautiful. From the maker, “did you know that elephants use their trunks to greet each other?” So sweet!

5// Gathre activity mat $140

gifts for kids

I absolutely love the Gathre micro mat for on-the-go diaper changes (so teeny and portable!) so I was excited to try a larger size for park dates, beach play, and everything in between. This version, designed by the lovely and talented Amanda Jane Jones, is sure to be an absolute hit for my car-obsessed tot.

Moonlight Storybook Projector $40

gift guide for kids

This storybook projector is very cool—the attachment clips onto your phone (compatible with 90% of mobile devices) and brings stories to life. I’m so excited to make it part of our bedtime routine, on nights when we have a little extra time. The add-on story reels would be make great (and affordable) birthday gifts.

Toolbox set $36

gifts for three-year-olds

My son loves to help with “projects”—I’m sure your kids do too. I searched high and low for a quality wooden tool set and this one fits the bill and is perfect for small spaces that don’t have room for a full tool bench. The wooden carrying case is a bonus!

Stocking Stuffers

Softcover photo book from $15

Kids love seeing photos of themselves—Leo has asked to “read” our family photo books before bedtime instead of his usual stories lately. He loves to point to different family members and call them by name. Since our families don’t leave close by, it’s a great way celebrate memories of times we’ve all been together.

Modo Dough $3-$10

kids gift guide

I discovered this dough at Target yesterday, near the typical Play-Doh sets and I was intrigued. It’s fragrance-free (anyone else loathe the smell of Play-Doh?), the containers are substantial (BPA, Phthalate-free, and dishwasher safe) and each container comes with a silicone “stamp” band to make little designs in your dough. If you’re not sold yet, check out this mom’s review. Target sells individual containers and sets of 3 that are not available on their website, as the reviewer notes.

Rainbow wooden top $11

gifts for three-year-olds

My son’s nanny brought back two wooden tops from her home country and I can’t tell you how many hours of play we’ve gotten out of these simple toys. This rainbow version is oversized, perfect for little fingers.

Bath crayons $4.50

kids holiday gift guide

Our family is always looking for new ways to change up bath time fun. As a working parent, I look forward to bath time as time when all of us can decompress after a busy day. Baths make for a great rainy day activity too, when you’re out of ideas and want to contain the mess :)

Reusable sticker book $11.50

gifts for toddlers

Any guide for traveling with small children will tell you that stickers are a great activity to buy a little peace and quiet. My almost-two-year-old is very into stickers these days, even if he still needs some assistance peeling them off the pages.

Nursery Decor: Rainbows & More!

I thought it would be fun to showcase nursery decor around a particular theme—today’s feature is all about rainbows! I noticed my Pinterest board filling up with everything RoyGBiv. Truth be told, this post feels more applicable to a spring refresh, but kids of all ages (adults too!) adore these colors and who doesn’t love a rainbow? Especially on cool, dreary days.

Keep in mind, rainbows are not all or nothing. They’re a great way to add a splash of color in pillow, blanket, or wall art form, and they come in many color variations from brights to pastels, even neon. Without further ado, here are 18 super cute rainbow accessories to add some color to your little one’s space.

Rainbows!.png